 |
| What's Hot! | Products/ Tools | EFI Tuning | Basic Tuning | Advanced Tuning | Chassis Tuning | Advertise with us |
CATEGORIES FOR ARTICLE LINKS BELOW
![]()
DOT Help |
Building an Aluminum Fuel Gas Tank / Cell


A DIY look at Welding an Aluminum Gas Tank with Baffles (Fuel Cell)
Contributed By: Enginebasics.com
While it is much easier to just buy a premade fuel tank, for many of us and our projects that is just not an option. We’re then left to fork out the big bucks and have a company build us a custom fuel cell, or we go for it on our own. This article is about what one should look out for and step by step instructions on how to build your own fuel tank / Cell.
STEP ONE: Designing the fuel Tank
Start by taking many measurements of the space your going to be placing your fuel tank in. This will be very time consuming and it is best to have a piece of paper handy to draw up the design and get all the measurements on. Keep in mind you need to have space for any fuel pick-ups, vents, fuel filler, mounting straps, fuel level sensors, and fuel lines. Also make sure the tank is located in an area that won’t get cooked by the exhaust, or if it is, make sure you plan to build some heat shielding around that area.
STEP TWO: Building a model
Now that you have your design on paper it’s time to build it into an actual prototype. The last thing you want is to spend hours building a fuel tank out of expensive material only to have it not fit or then recognize something you missed in the design. The easiest way to do this is CARDBOARD. When it comes to fabrication of anything, cardboard is your number one go to friend. Take all your measurements from your plans and exactly construct a cardboard model of the tank. Be sure that the cardboard represents the actual pieces you will cut out of the sheet metal to construct your tank. Tape the cardboard together into your designed fuel tank and be sure it fits.
(To see any image larger, click on the image)
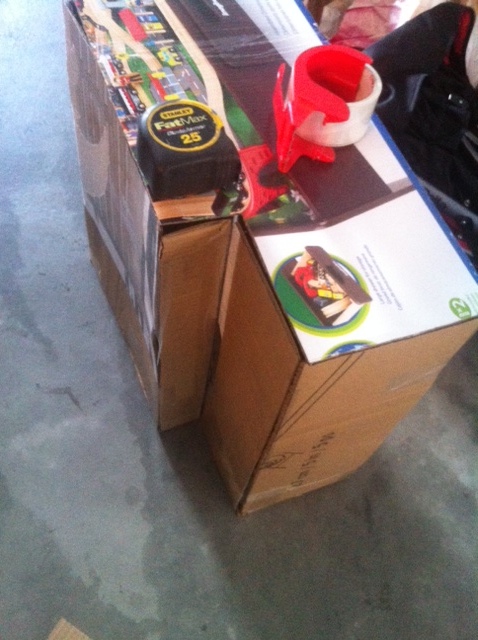
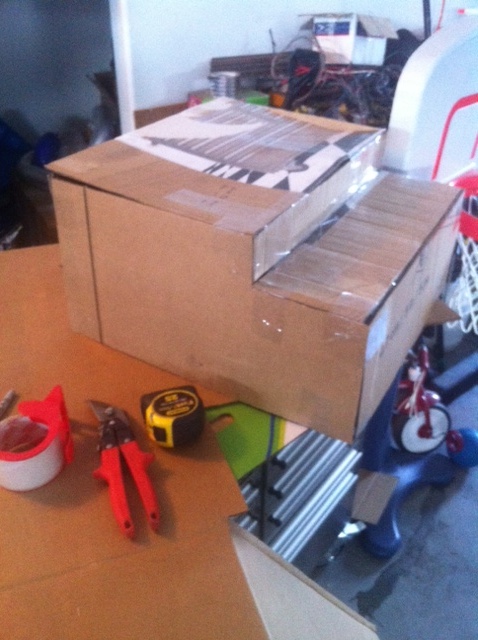
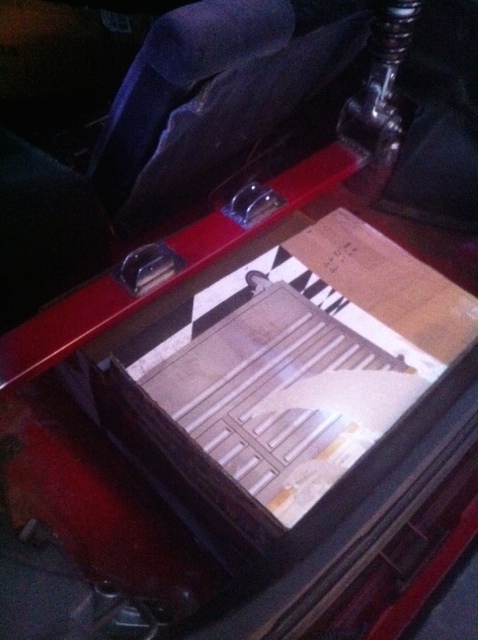
Here you can see the first fuel cell mocked up in cardboard and test fitted into the rear of the vehicle. It ended up not being able to be installed perfectly and needed modification. Lucky for us it was only cardboard and not the real thing.
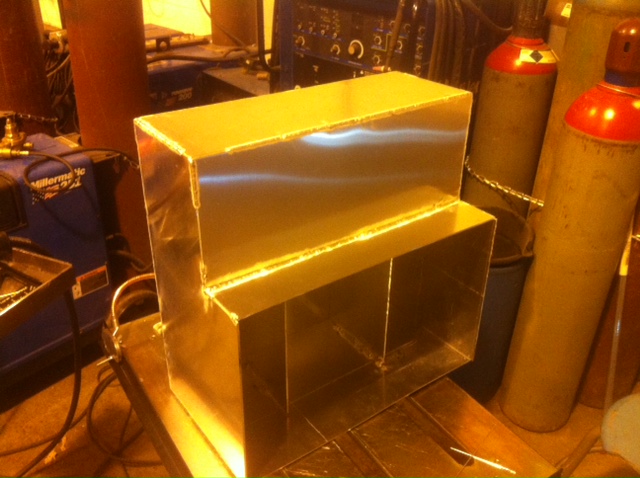
STEP THREE: Choosing a material and cutting out the tank
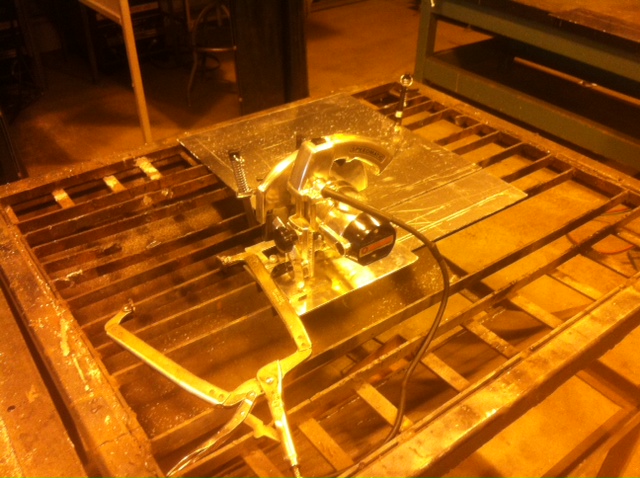
Take your cardboard model and replicate all the pieces of the gas tank over onto your metal. Cutting sheet metal is actually very simple with a skill saw and a 40-50 teeth carbide blade. Seen here is a 46T carbide blade on a skill saw. The blade we used was purchased off amazon and is found below:
Be sure that everything is clamped down before cutting. The matterial used here is H4 3003 .125 aluminum plate.
You have some options here on material so let’s consider them.
- Building the fuel tank out of mild steel. Building the cell out of mild steel is fine, but just remember that mild steel is corrosive so you will need to add some steps to your construction. You will need to coat not only the inside of the fuel tank, but the outside as well. It can be a tedious process and if the coating isn’t applied right, or if you don’t get good coverage, it could spell disaster. Also many have found the coating not holding up well after years of use. For this reason mild steel is often not recommended.
- Stainless steel. Stainless is a great material to make a gas tank from. It’s highly resistant to corrosion and not terribly difficult to weld. While more expensive than mild steel, it would probably end up being about the same cost by the time you factor in the expensive coatings that need to also be purchased if using mild steel. If you lack the ability to weld aluminum than this should be the material you choose.
- Aluminum. Many fuel tanks / cells that you see on the market will be made of aluminum. Aluminums ability to be extremely resistant to corrosion because of the oxidation layer that develops on top of exposed aluminum makes it an excellent choice. Another big plus is its weight. Aluminum is about 33% lighter than steel of equal strength. This makes aluminum the hands down winner for gas tank construction. So what’s the downside? Aluminum is incredibly difficult to weld. Already 90% of all fabricators have just given up in using aluminum, because of the difficulty in welding it. Even if you lack the ability, don’t hesitate to construct the entire fuel cell and take it to a local welder to have it welded for you. You would still be saving a ton of money and be left with a superior product.
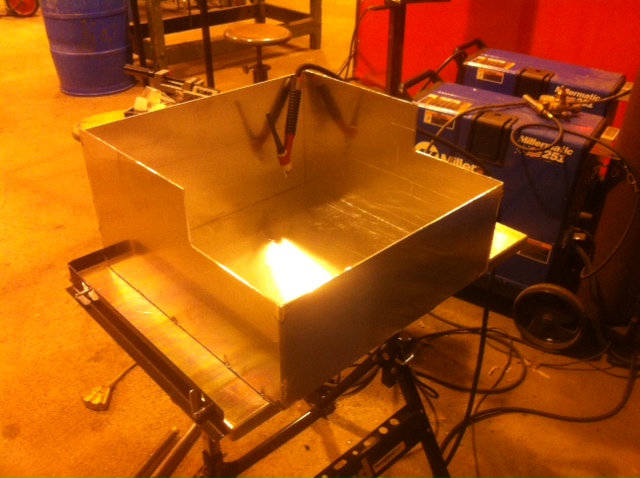
STEP FOUR: Building a sump or baffle into a fuel tank
Once your material has been chosen and your material all cut out you then need to decide how you are going to deal with what is called tank slosh. Tank slosh is when you’re going around a corner or accelerating and the fuel moves around in the gas tank. When the fuel moves around it has the ability to starve the fuel pump of fuel if the vehicle is running low on gas. This can be DEADLY in not only burning out a fuel pump by running it dry, but also causing a lean air fuel condition in the motor and causing a motor to grenade. This step should be taken very seriously so let’s look at some options:
- Fuel cell foam. Fuel cell foam is exactly as it sounds…..it’s fuel resistant foam. By stuffing the fuel tank with foam you slow the sloshing motion of the fuel. By slowing that sloshing motion you hope that you will have enough time to be through the corner or done with the acceleration and fuel will then move back to surround the fuel pump pickup. Foam has been proven to help and is used successfully by many, but just as many report that foam didn’t solve the problem. While the foam method is by far the easiest, it won’t work for extreme sloshing situations or tanks that have very large dimensions allowing the fuel to have lots of movement inside the tank.
2. Fuel sump. A sump is an area that has been built into the tank to surround the fuel pump pickup. This area has walls that are built up around the pickup to keep it submerged in fuel. It usually has small holes in the bottom of the walls to let small amounts of fuel in and out, but won ’t allow drastic changes in fuel level at any moment. Also the return fuel line is discharged into this area as well to feed it with fuel. Fuel sumps are a must if one wants to combat fuel-starving issues. The easiest way to build a sump is to build a circular base that is 4”-5” in diameter and ¼ the height of your fuel tank. SO let’s say your tank is 12” tall, than you would have the sides of the sump be 3” tall. To make this easy one might purchase a pipe that is the diameter that you want of 4”-5” and then cut the height appropriately.
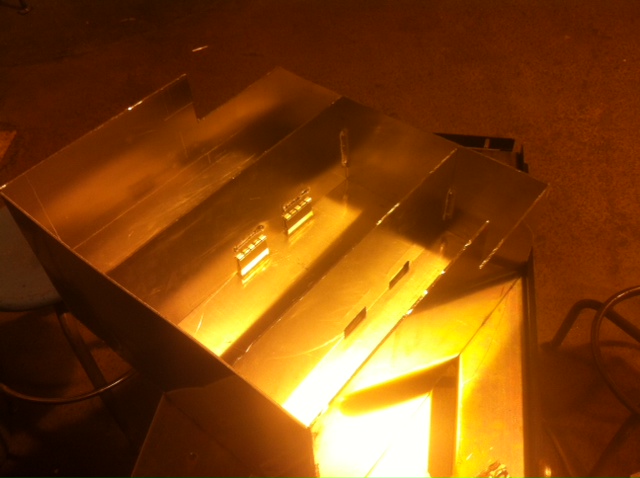
3. Trap Doors / fuel tank dividers. Look at any track/race car fuel cell or tank and they will be divided into sections or small cells that have trap doors or just small holes between them. This method essentially makes any large fuel tank into many small ones. Why is that important? Small fuel tanks don’t have tank slosh issues because there is nowhere for the fuel to slosh to. Therefor the fuel pump pickup is always submerged. Small holes or hinged doors are then drilled onto the bottom of these wall dividers for fuel to slowly move between the cells, but any rapid acceleration will not allow much fuel movement at any one time. While it is important to keep the fuel pump pickup submerged there are others reasons this is done. Track cars having potentially 100+ pounds of fuel shifting weight around in a car can wreck havoc on the balance of the car. For this reason keeping the weight of the fuel in a small area becomes as important as keeping the pump submerged. If building your own fuel tank this is something that shouldn’t be ignored. While the trap door method takes a bit more planning and execution, putting in a few dividers and drilling some holes on the bottom should not be a big deal. For the build found here we used these baffle doors from amazon:
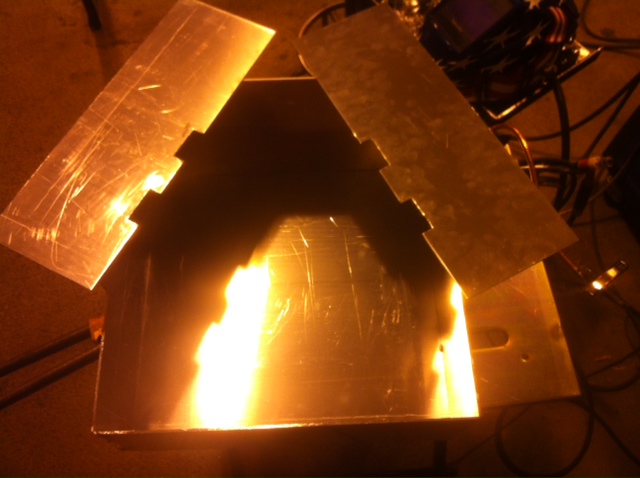
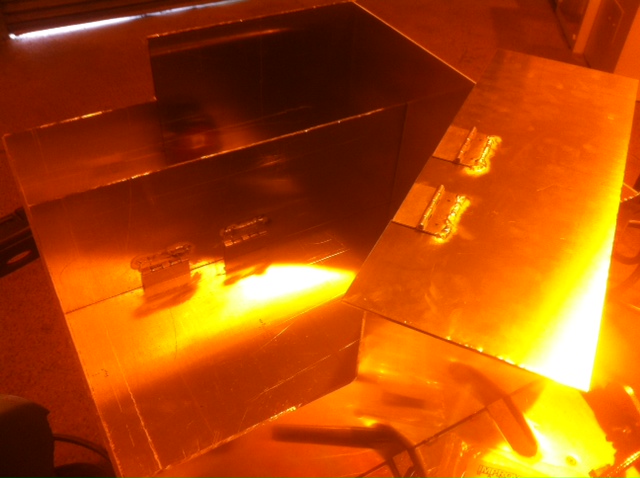
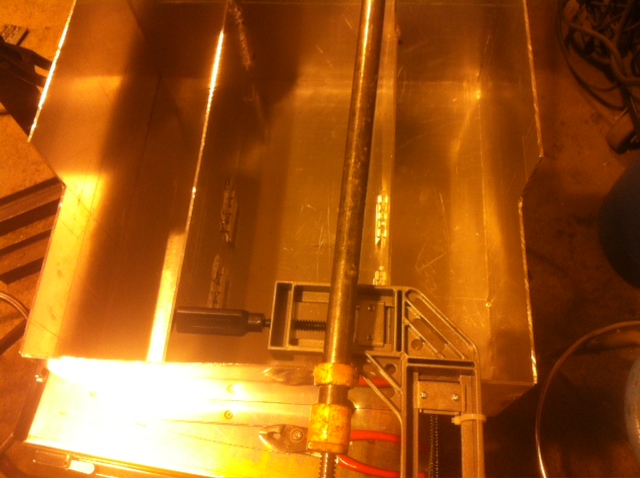
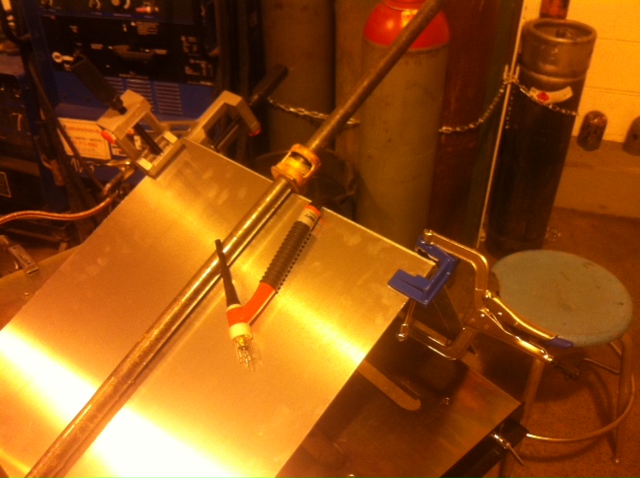
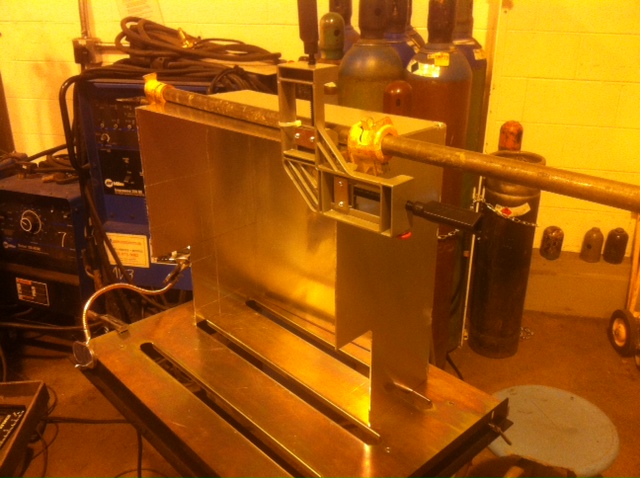
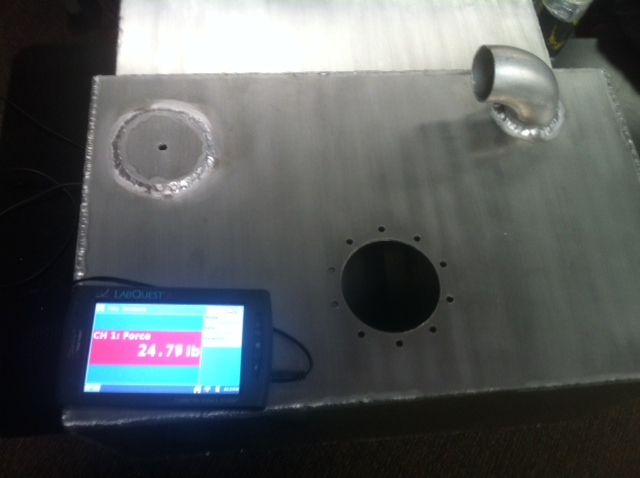
STEP 5: Welding the gas tank together
It is time to put all the hard work together and actually make a container. Understand that no matter what material you use or the reasonable thickness you decide to go with, the material is going to warp and move on you. Fuel tanks usually require long welds with extended periods of heat that will cause a lot of warping and moving of the metal. To be successful you will need to make sure you clamp your tank in as many places as possible before you start. Then learn to embrace the tack weld. Tack welding in many places will help keep things square and from moving when you go back to do the final passes. Also be sure you are moving around welding different areas of the tank. Don’t just fit up a side of the gas tank and go to town. Set it up, tack it, and then move on. Almost the entire fuel tank should be tacked together before any final welding is done. Even then you should weld a small section of one side and then move to another side. Take breaks often to let the tank cool and keep from warping. We ordered some really nice 90 degree clamps to help us keep things lined up:
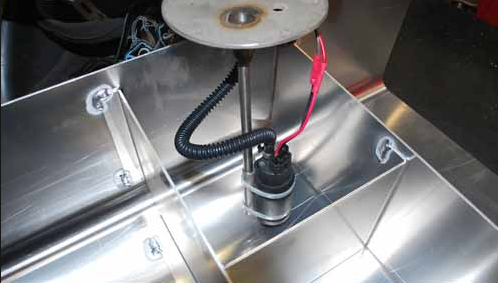
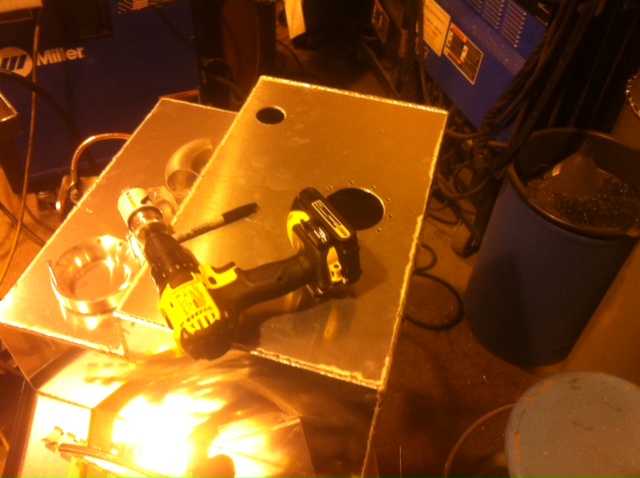
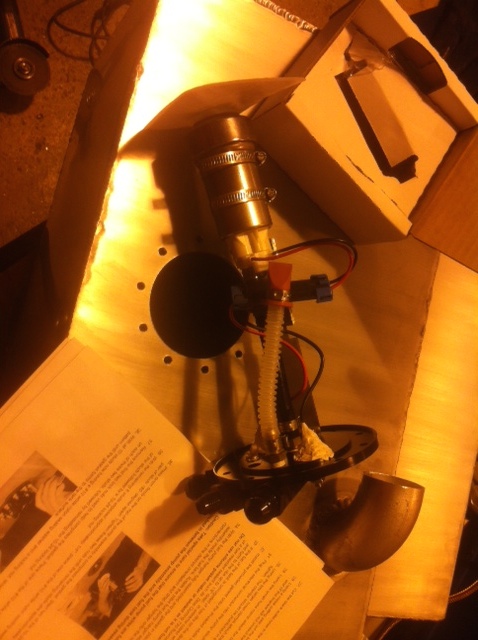
STEP 6: Laying out the fuel pickup, return, vent, fuel gauge sender, and fuel filler neck
The final step of any fuel tank construction is laying out the final pieces that will move fuel in and out of the tank. The tank used in the example here used a premade pickup/return/vent all built in to one package that we purchased off amazon:
The only things that needed to be added were a fuel level sensor and the filler neck. If you won’t be filling the tank using the factory gas fill area, than be sure to leave space for a large fuel door that can be accessed to fill the tank.
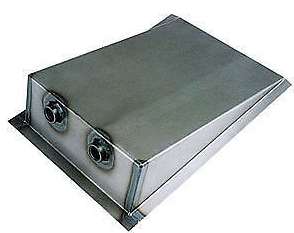
If your curious what the gas tank ended up weighing that we built here it is: ~25 lbs
It was calculated to hold 14 gallons.
STEP 7: Checking the fuel tank for leaks
Pressure testing the fuel tank is about the only way to be sure there are no leaks. While many just fill the tanks with water, super small pinholes won’t leak at times under these conditions. Later the fuel tanks are installed only to constantly stink like fuel and have a slow drip because of a small leak not discovered by the water. The best way to do it is to drill a small hole and apply pressure to the tank. Any leaks will immediately show themselves with a little soap and water being placed on the welds. Don’t skip this step or it could spell disaster on what should be a fun fabrication project.
STEP 8: Mounting the fuel tank
Make sure the tank is securely mounted to the vehicle and will not be rubbing or have adverse contact with anything. If using the vehicle in sanctioned events, be sure to look up that organizations rules for fuel tank / cell mounting and follow them accordingly. Many organizations have specific rules to the mounting of a non-OEM fuel tank.
Well that does it. Hopefully you find this article informative and help you in your DIY building of your fuel tank. Be sure to check out some of the other articles found here at enginebasics.com to help you with your next project. If you have any questions about this article please contact us. Be sure to like our page on facebook and follow us on instagram.
ATTENTION READER:
If you enjoyed the information and article you just read be sure to check out our newly released book with even more exciting photo's and information:How to Turbocharge and Tune your Engine

Want to know more about your particular Make and Model vehicle? All of these vehicles are covered in the tech, maintenance and repair articles found above. Enginebasics is the wiki or wikipedia of car part, repair, how to and tuning information. Let us be the class 101 for your automotive learning.
| Ford | General Motors GM | Pontiac | Jaguar | Land Rover | Nissan |
| Toyota | Honda | Lexus | Acura | Lotus | Scion |
| Infinity | BMW | Mercedes | Mitsubishi | Ferrari | Maserati |
| Lamborghini | Volks Wagen VW | Saab | Audi | Hyundai | Kia |
| Subaru | Mazda | Chevy | Volvo | Caddilac | Dodge |
| Chrylser | Daewoo | Porsche | Mercury | Freightliner | MG |
Individual Models
| Ford Mustang | Mitsubishi Eclipse | Mitsubishi Evo | Subaru WRX / STI | Dodge Viper | Chevrolet Corvette |
| Nissan Skyline | Honda S2000 | Nissan 350z | Toyota Supra | Chevy Camaro | Lotus Elise Exige |
| Honda Civic | VW Golf | Dodge SRT-4 | Eagle Talon | Acura Integra | BMW M3 |
| Nissan 240sx | Porsche 911 | Acura NSX | Honda Accord | Toyota Camry | Toyota MR2 |
| VW R32 | Dodge Truck | Mazda Rx7 | VW Jetta | Sand Buggy | Nissan Sentra |
For the latest Automotive news and stories visit the websites below |


Our feature Build: An AWD V6 Civic